使用的环境:wsl2(alpine),docker
参考官方文档:https://narukara.github.io/std-training-zh-cn/02_2_software.html
1.使用docker pull拉取官方提供的docker image
docker pull espressif/rust-std-training2.使用命令docker images查看image状态,拉取成功的输出:
REPOSITORY                    TAG       IMAGE ID       CREATED        SIZE
espressif/rust-std-training   latest    660e68996c1b   3 months ago   3.99GB
3.启动容器:
docker run --mount type=bind,source="$(pwd)",target=/workspace,consistency=cached -it rust-std-training /bin/bash
这行命令表示在当前文件夹作为映射目录,映射到docker容器的/workspace目录,并进入到容器内部终端
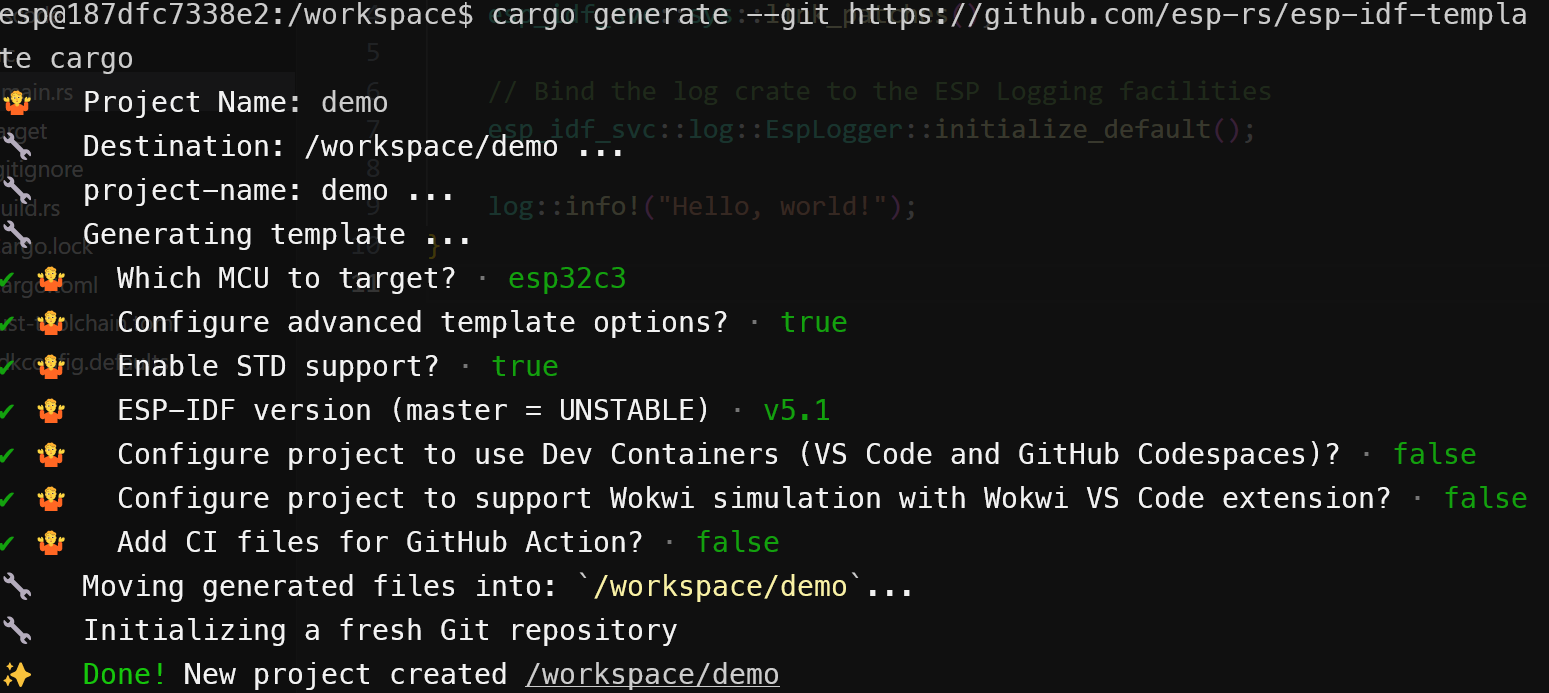
4.执行命令构建项目,从官方提供的github模板仓库构建
cargo generate --git https://github.com/esp-rs/esp-idf-template cargo这里创建项目可能会提示错误:Error: could not determine the current user, please set $USER
解决方法
export USER=root
5.项目创建完成之后,直接编译
cargo build --release第一次编译可能时间会有点久,将近三分钟了
编译完成之后回到wsl2的终端,或者使用powershell
cd到映射的宿主机目录
可执行文件在
target/riscv32imc-esp-espidf/release/demo
6.执行flash烧录命令
espflash.exe flash ./demo --monitor
烧录成功,打印了hello world。


权限不足,sudo chmod -R a+w "$(pwd)"